
Zoom Audio Settings
updated 11/14/2020
Note: The latest version of zoom is 5.4.2 but the instructions below work.
These instructions are available in the desktop version of Zoom for Mac and PC. The audio options shown below may not available on tablets, chromebooks or smartphones.
Smart phone and tablet users should search for an option to “Use Original Sound” in your Meetings settings. (Note these are the app settings NOT meeting settings.)
Once you’ve turned on “Use Original Sound, “look for the “Enable Original Sound setting under the More menu during your next meeting.
5.2 Zoom audio settings
(Instructions excerpted from this article.)
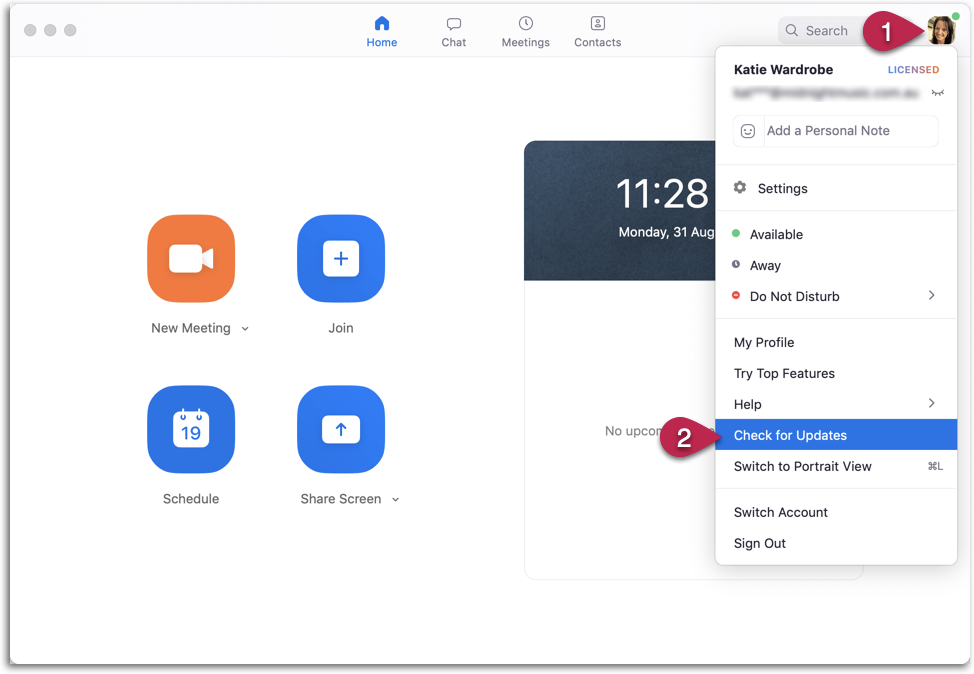
- Click on your profile picture in the zoom app
- Select Check for Updates
A message will show letting you know that you either are up to date, or that there is an update available.
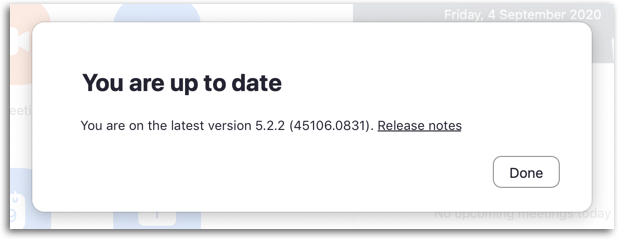
(Note: latest Zoom version is 5.2.3.)
Adjust audio settings
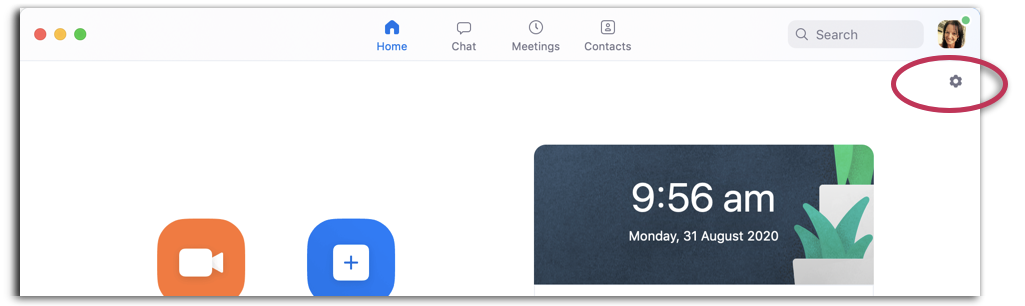
On your Zoom desktop client, open Settings by clicking on the cog.
You can also click on your profile picture and choose Settings from the drop-down menu.
Settings to choose
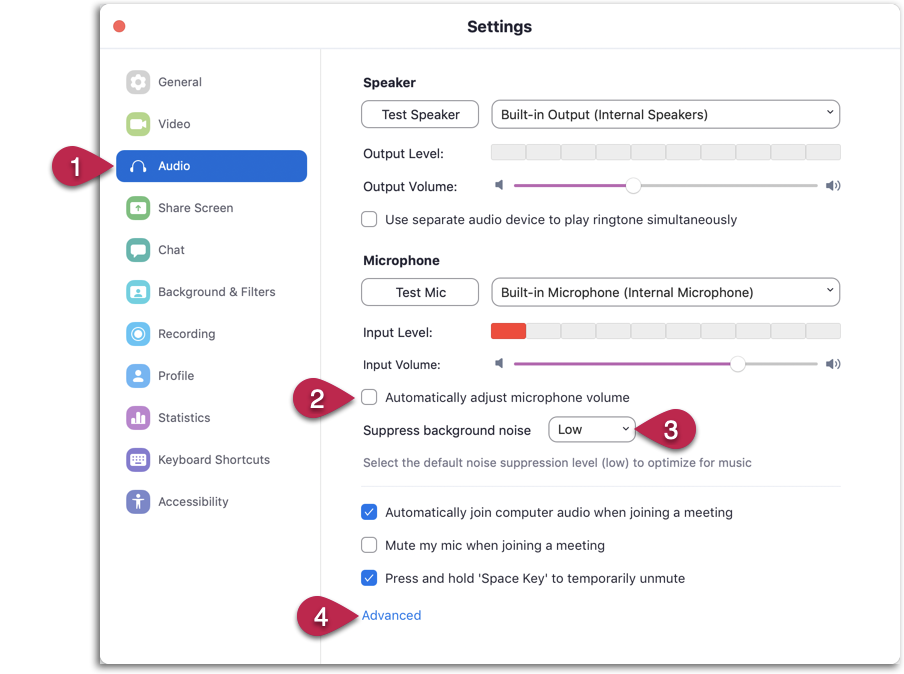
Next, do the following:
- Click on Audio in the menu on the left
- Uncheck Automatically adjust microphone volume
- Set Suppress background noise to Low
- Click on Advanced
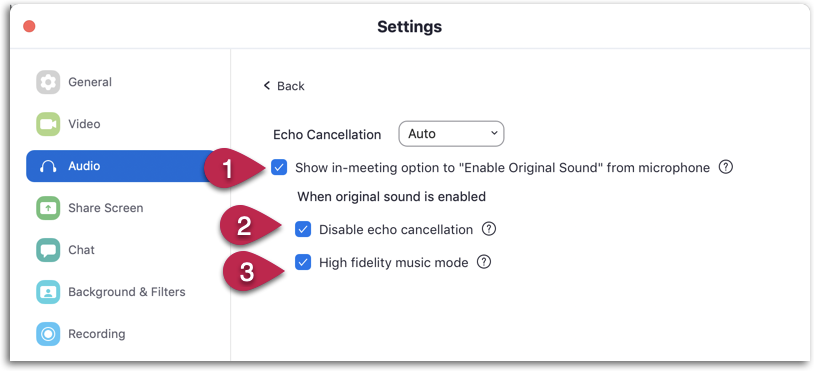
On the Advanced settings page do the following:
- Check the box next to Show in-meeting option to “Enable Original Sound” from microphone
- Check the Disable echo cancellation box*
- Check the High fidelity music mode box**
*note: the Disable echo cancellation option works best with headphones and a decent quality EXTERNAL microphone. (In other words, if you don’t have headphones and an separate microphone, do not check this box.)
**note: the High fidelity music mode increase CPU utilization and consumes greater network bandwidth so it will not suit everyone. Only check this box if you use an Ethernet connection (not wi-fi) to connect to the internet.
11/14/2020 – a third option Use stereo audio is available under “when original sound is enabled.” Leave this box unchecked unless you are using an external stereo mic or 2-channel audio interface
Do I need to adjust the above settings every time I have a lesson?
In my experience, the settings you have adjusted in your Zoom desktop client will remain this way until you decide to change them.
Any time you update Zoom, double-check the settings again to make sure everything is still working the way you expect it to.
To get “professional” sound (optional!)
For those interested in having the highest quality of musical sound in zoom, the recommendations below will allow you to take advantage of the advanced audio settings above.
- Connect to your network via an ethernet cable instead of using wifi. (Be sure to turn off wi-fi if you choose this option). If you are unable to do that, locate your computer (device) as close as possible to the router. It’s also ideal if there are no walls between you and the router. If that’s not possible, you might consider a wifi repeater or extender which will extend the coverage of your wifi network (Again, this is NOT required!)
- Use wired headphones; wireless headphones can contribute to latency (delay)
- Use the best quality microphone you can. One option is to use a USB microphone which plugs directly into your computer. For more professional results, use more professional equipment, such as audio interface with a dynamic vocal mic plugged in.